- | Home |
- Company |
- Contact |
- News |
- S/ware Eng |
- Standards |
- Academic Support |
- Documents |

- | Requirements |
- Compilers |
- Validation |
- RTOS |
- Analysis |
- Hardware |
- Software |
- Resources |
- Products |
emWin Graphics Library
emWin is designed to provide an efficient, processor- and LCD controller-independent graphical user interface (GUI) for any application that operates with a graphical LCD. It is compatible with single-task and multitask environments, with a proprietary operating system or with any commercial RTOS. emWin is shipped as "C" source code. It may be adapted to any size physical and virtual display with any LCD controller and CPU
Stand alone emWin Dashboard demo
Click here
Features include the following:
Overview
-
Any 8/16/32-bit CPU; only an ANSI "C" compiler is required.
-
Any (monochrome, grayscale or color) LCD with any controller supported (if the right driver is available).
-
May work without LCD controller on smaller displays.
-
Any interface supported using configuration macros.
-
Display-size configurable.
-
Characters and bitmaps may be written at any point on the LCD, not just on even-numbered byte addresses.
-
Routines are optimized for both size and speed.
-
Compile time switches allow for different optimizations.
-
For slower LCD controllers, LCD can be cached in memory, reducing access to a minimum and resulting in very high speed.
-
Clear structure.
-
Virtual display support; the virtual display can be larger than the actual display.
Windows Manager
The window manager supplies a set of routines which allow you to easily create, move, resize, and otherwise manipulate any number of windows. It also provides lower-level support by managing the layering of windows on the display and by alerting your application to display changes that affect its windows.
Explanation of terms
Windows are rectangular in shape, defined by their origin (the X- and Y-coordinates of the upper left corner) as well as their X- and Y-sizes (width and height, respectively). A window in emWin:
is rectangular.
-
has a Z-position.
-
may be hidden or shown.
-
may have valid and/or invalid areas.
-
may or may not have transparency.
-
may or may not have a callback routine.
Active window
The window which is currently being used for drawing operations is referred to as the active window. It is not necessarily the same as the topmost window.
Callback routines
Callback routines are defined by the user program, instructing the graphic system to call a specific function when a specific event occurs. Normally they are used to automatically redraw a window when its content has changed.
Child/parent windows, siblings
A child window is one that is defined relative to another window, called the parent. Whenever a parent window moves, its child or children move correspondingly. A child window is always completely contained within its parent, and will be clipped if necessary. Multiple child windows with the same parent are considered "siblings" to one another.
Client area
The client area of a window is simply its usable area. If a window contains a frame or title bar, then the client area is the rectangular inner area. If there is no such frame, then the coordinates of the client area are identical to those of the window itself.
Clipping, clip area
Clipping is the process of limiting output to a window or part of it. The clip area of a window is its visible area. This is the window area minus the area obstructed by siblings of higher Z-order, minus any part that does not fit into the visible area of the parent window.
Desktop window
The desktop window is automatically created by the window manager, and always covers the entire display area. It is always the bottommost window, and when no other window has been defined, it is the default (active) window. All windows are descendants (children, grandchildren, etc.) of the desktop window.
Handle
When a new window is created, the WM assigns it a unique identifier called a handle. The handle is used in any further operations performed on that particular window.
Hiding/showing windows
A hidden window is not visible, although it still exists (has a handle). When a window is created, it is hidden by default if no create flag is specified. Showing a window makes it visible; hiding it makes it invisible.
Transparency
A window that has transparency contains areas that are not redrawn with the rest of the window. These areas operate as though the window behind "shows through" them. In this case, it is important that the window behind is redrawn before the win- dow with transparency. The WM automatically handles redrawal in the correct order.
Validation/invalidation
Validation/invalidation
Z-position, bottom/top
Although a window is displayed on a two-dimensional screen in terms of X and Y, the WM also manages what is known as a Z-position, or depth coordinate -- a position in a virtual third dimension which determines its placement from background to fore- ground. Windows can therefore appear on top of or beneath one another. Setting a window to the bottom will place it "underneath" all of its sibling windows (if any); setting it to the top will place it "on top of" its siblings. When a window is created, it is set to the top by default if no create flag is specified.
Drivers
A display driver supports a particular family of display controllers (typically LCD controllers) and all displays which are connected to one or more of these controllers. The driver is essentially generic, meaning it can be configured by modifying the configuration file LCDConf.h. The driver itself does not need to be modified. This file contains all configurable options for the driver including how the hardware is accessed and how the controller(s) are connected to the display.
Configurable options include the following:
LCD_XSIZE |
horizontal resolution |
LCD_YSIZE |
vertical resolution |
LCD_XORG |
horizontal position on the logical screen |
LCD_YORG |
vertical position on the logical screen |
LCD_MIRROR_X |
mirrors horizontal axis if activated |
LCD_MIRROR_Y |
mirrors vertical axis if activated |
LCD_SWAP_XY |
swaps x/y axes |
For a list of drivers for LCD screens click here
Fonts and Font Converter
:
A variety of different fonts are shipped with the basic software: 4*6, 6*8, 6*9, 8*8, 8*9, 8*16, 8*17, 8*18, 24*32, and proportional fonts with pixel-heights of 8, 10, 13, 16.
-
New fonts can be defined and simply linked in.
-
Only the fonts used by the application are actually linked to the resulting executable, resulting in minimum ROM usage.
-
Fonts are fully scalable, separately in X and Y.
-
Fonts which can be used with emWin must be defined as GUI_FONT structures in "C". The structures - or rather the font data which is referenced by these structures - can be rather large. It is very time-consuming and inefficient to generate these fonts manually.
Segger therefore recommend using FontConvert, which automatically generates "C" files from fonts. The font converter is a Windows program which is easy to use. Simply load an installed Windows font into the program, edit it if you want or have to, and save it as a "C" file. The "C" file may then be compiled, allowing the font to be shown on your display with emWin on demand. The following is a sample screen shot of the font converter with a font loaded in normal (standard) mode

Monotype are one of the worlds leading suppliers of fonts. They can advise on fonts for print and screen use and fonts for any language in the world.
|
||
legibility research |
Monotype believes that highly legible typefaces are an important, foundational element of great HMI design. For more information on legibility and readability on control screens. Click here
|
|
|
One country doesn’t always mean one language, and individual countries are frequently home to a variety of spoken languages, often using different scripts or writing systems. It’s not always easy to figure out which script is used by which language, or even which language is most common to a certain country. Monotype now offers a Language, Script and Country Guide that allows a user to cross-reference all three criteria. Click Here
|
|
 |
Selection of the right font for legibility and function is important. Some are designed for print and others for screen use. Using an appropriate font can make all the difference in how a user interacts with a screen or document.
Fonts from Adobe, Linotype, Monotype, ITC and hundreds of other font providers. click here
|
|
Bitmap converter
Bitmaps which can be used with emWin are normally defined as GUI_BITMAP structures in C. The structures -- or rather the picture data which is referenced by these structures -- can be quite large. It is time-consuming and inefficient to generate these bitmaps manually, especially if you are dealing with images of considerable size and with multiple shades of grey or colours. Segger therefore recommend using the bitmap converter, which automatically generates C files from bitmaps.
The bitmap converter is a Windows program which is easy to use. Simply load a bitmap (in the form of a .bmp file) into the application. Convert the colour format if you want or have to, and convert it into a C file by saving it in the appropriate format. The C file may then be compiled, allowing the image to be shown on your display with emWin.
What it does
The bitmap converter is intended as a tool to convert bitmaps from a PC format to a C file. It also features colour conversion, so that the resulting C code is not unnecessarily large. You would typically reduce the number of bits per pixel in order to reduce memory consumption. The bitmap converter displays the converted image.
A number of simple functions can be performed with the bitmap converter, including flipping the bitmap horizontally or vertically, rotating it, and inverting the bitmap indices or colours (these features can be found under the Image menu). Any further modifications to an image must be made in a bitmap manipulation program such as Adobe Photoshop or Corel Photopaint. It usually makes the most sense to perform any image modifications in such a program, using the bitmap converter for converting purposes only.
Loading a bitmap
Loading from a file
A bitmap image in .bmp format may be opened directly in the bitmap converter by selecting File/Open . The following .bmp files may be loaded:
1,4,8,16 or 32 bits per pixel (bpp) with palette;
-
24 bpp without palette (RGB/full-color mode);
-
RLE4 and RLE8.
Using the clipboard
Any other type of bitmap (i.e. .gif , .jpg , .jpeg , .png , .tif ) may be opened with another program, copied to the clipboard, and pasted into the bitmap converter. This process will achieve the same effect as loading directly from a file.
Compressed bitmaps
The bitmap converter and emWin support run-length encoding (RLE) compression of bitmaps in the resulting source code files. The RLE compression method works most efficiently if your bitmap contains many horizontal sequences of equal-colored pixels. An efficiently compressed bitmap will save a significant amount of space. However, compression is not recommended for photographic images since they do not normally have sequences of identical pixels. It should also be noted that a compressed image may take slightly longer to display.
If you want to save a bitmap using RLE compression, you can do so by selecting one of the compressed output formats when saving as a C file: "emWin C with palette, compressed" or "emWin C without palette, compressed". There are no special functions needed for displaying compressed bitmaps; it works in the same way as displaying uncompressed bitmaps.
Compression ratios
The ratio of compression achieved will vary depending on the bitmap used. The more horizontal uniformity in the image, the better the ratio will be. A higher number of bits per pixel will also result in a higher degree of compression.
In the bitmap used in the previous examples, the total number of pixels in the image is (200*94) = 18,800.
Since 2 pixels are stored in 1 byte, the total uncompressed size of the image is 18,800/2 = 9,400 bytes.
The total compressed size for this particular bitmap is 3,803 bytes for 18,800 pixels
The ratio of compression can therefore be calculated as 9,400/3,803 = 2.47.
Memory Devices
Memory devices can be used in a variety of situations, mainly to prevent the display from flickering when using drawing operations for overlapping items. The basic idea is quite simple. Without the use of a memory device, drawing operations write directly to the display. The screen is updated as drawing operations are executed, which gives it a flickering appearance as the various updates are made. For example, if you wanted to draw a bitmap in the background and some transparent text in the foreground, you would first have to draw the bitmap and then the text. The effect would be a flickering of the text.
If a memory device is used for such a procedure, however, all drawing operations are executed in memory. The final result is displayed on the screen only when all operations have been carried out, with the advantage of no flickering. This difference can be seen in the example in the following section, which illustrates a sequence of drawing operations both with and without the use of a memory device.
The distinction may be summarized as follows: If no memory device is used, the effects of drawing operations can be seen step by step, with the disadvantage of a flickering display. With a memory device, the effects of all routines are made visible as a single operation. No intermediate steps can actually be seen. The advantage, as explained above, is that display flickering is completely eliminated, and this is often desirable. Memory devices are an additional (optional) software item and are not shipped with the emWin basic package. The software for memory devices is located in the subdirectory Memdev of the GUI directory
Auto device object
An auto device object is often preferred for applications such as moving pointers, in which only a small part of the display is updated at a time. The device automatically distinguishes which parts of the display consist of fixed items and which parts consist of moving or changing items. When the drawing function for the auto device object is called for the first time, it draws all items. Each further call updates only the space used by the moving or changing objects. The actual drawing operation uses the banding memory device, but only within the necessary area. The main advantage of using an auto device object is that it saves computation time, since it does not keep updating the entire display.
Widgets
Widgets are windows with object type properties; they are called controls in the windows world and make up the elements of the user interface. They can react automatically to certain events; for example, a button can appear in a different state if it is pressed.
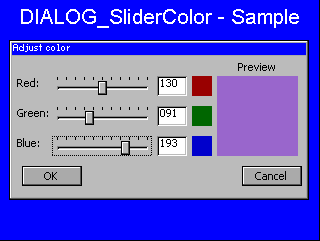 |
Widgets need to be created, have properties which may be changed at any time during their existence and are then typically deleted when they are no longer needed. Just like a window, a widget is referenced by a handle which is returned by its create function. Widgets require the window manager. Once a widget is created, it is treated just like any other window; the WM ensures that it is properly displayed (and redrawn) when ever necessary. Widgets are not required when writing an application or a user interface, but they can make programming much easier. |
Available widgets
The following widgets are currently available:
Name |
Explanation |
BUTTON |
Button which can be pressed. Text or bitmaps may be displayed on a button. |
CHECKBOX |
Check box which may be checked or unchecked. |
DROPDOWN |
Dropdown listbox, opens a listbox when pressed |
EDIT |
Single-line edit field which prompts the user to type a number or text. |
FRAMEWIN |
Frame window. Creates the typical GUI look. |
GRAPH |
Graph widget, used to show curves or measured values. |
HEADER |
Header control, used to manage columns |
LISTBOX |
Listbox which highlights items as they are selected by the user. |
LISTVIEW |
Listview widgets are used to creates tables |
MENU |
Menu widgets are used to create horizontal and vertical menus. |
MESSAGEBOX |
A MESSAGEBOX widget is used to show a message in a frame window with a title bar, as well as an "OK" button which must be pressed in order to close the window. |
MULTIEDIT |
Multiedit widgets are used to edit multiple lines of text. |
MULTIPAGE |
Multipage widgets are used to create dialogs with multiple pages. |
PROGBAR |
Progress bar used for visualization. |
RADIOBUTTON |
Radio button which may be selected. Only one button may be selected at a time. |
SCROLLBAR |
Scrollbar which may be horizontal or vertical. |
SLIDER |
Slider bar used for changing values. |
TEXT |
Static text controls typically used in dialogs. |
WINDOW |
The WINDOW widget is used to create a dialog window from a resource table. |
Multiple Layer/Display
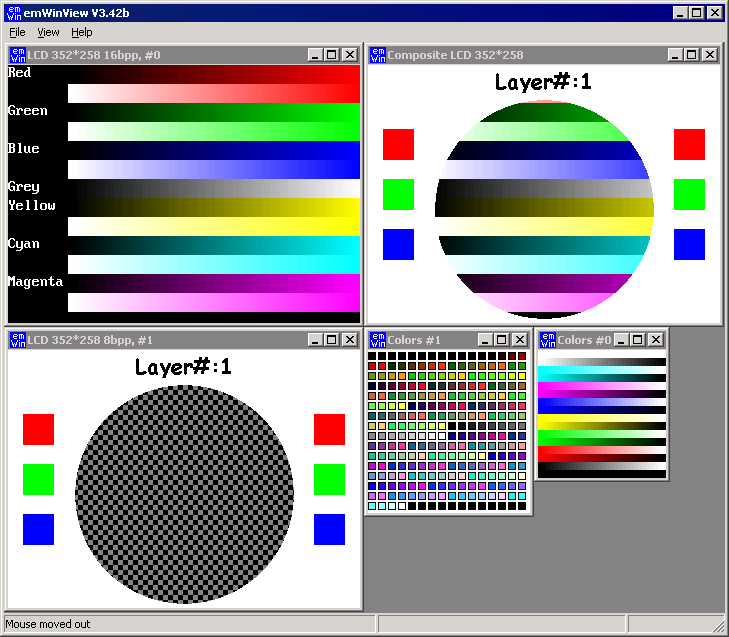
Windows can be placed in any layer or display, drawing operations can be used on any layer or display. Since there are really only smaller differences from this point of view, multiple layers and multiple displays are handled the same way (using the same API routines) and are simply referred to as multiple layers, even if the particular embedded system uses multiple displays. The emWin viewer allows you to look at every individual layer (display), but in the case of multiple layer systems also to look at the actual output (the composite view).
Limitations
Currently systems with a total of max 6 displays / layers are supported
VNC
VNC consists of two types of components. A server, which generates a display, and a viewer, which actually draws the display on your screen. The remote machine (target or simulation) can not only be viewed, but also controlled via mouse or keyboard. The server and the viewer may be on different machines and on different architectures. The protocol which connects the server and viewer is simple, open, and plat- form independent. No state is stored at the viewer. Breaking the viewer's connection to the server and then reconnecting will not result in any loss of data. Because the connection can be remade from somewhere else, you have easy mobility. Using the VNC server, you may control your target from anywhere and you can make screenshots (e.g. for a manual) from a "live" system.
Requirements
TCP/IP stack
Since the communication between the server and the viewer is based on a TCP/IP connection, VNC requires a TCP/IP stack. In the Win32 simulation environment, TCP/ IP (Winsock) is normally present. In the target, a TCP/IP stack needs to be present. The TCP/IP stack is NOT part of emWin. The flexible interface ensures that any TCP/ IP stack can be used.
Multi tasking
The VNC server needs to run as a separate thread. Therefore a multi tasking system is required to use the emWin VNC server.
Notes on this implementation
Supported client to server messages
The emWin VNC server supports pointer event messages and keyboard event messages.
Encoding
The server supports raw encoding and hextile encoding.
Authentication
The Server currently does not require authentication. However, this feature can be added to the server easily at request.
Performance
Most viewers support hextile encoding, which supports descent compression. A typical quarter VGA screen requires typically 20 - 50 kb of data. An implementation running on an ARM7 platform (50 MHZ, with Cache) requires app. 200 - 300 ms for an update of the entire screen. The server handles incremental updates; in most cases the updated display area is a lot smaller than the entire display and less data needs to be transmitted. A typical ARM7 system therefore allows real time updates.
Multiple servers
The implementation is fully thread safe and reentrant; multiple VNC servers can be started on the same CPU for different layers or displays. If your target (of course the same holds true for the simulation) has multiple displays or multiple layers, this can be a useful option. Only one VNC server may be started per layer at any given time; once the connection to a Viewer ends, an other one can connect.
The VNC viewer
Availability
The sub folder™Tool™ contains a VNC viewer from the AT&T Laboratories Cambridge. It is free software and is distributed under the terms of the GNU Public License. The current version of the VNC software can be downloaded from http:// www.uk.research.att.com/vnc, where more information about the VNC protocol, as well as source code for servers and clients for different platforms are available.
Version
The VNC implementation of emWin has been tested with version 3.3.3R2 and should work with this version or later versions.
Platforms
The viewer is available for different platforms. Please take a look to the web site of AT&T Laboratories Cambridge for detailed information about the availability.
Simulation
A simulation environment under MSVC++ is available. It can be used to write and test the entire user-interface on the PC (all routines are 100% identical to your embedded application, no matter what CPU or LCD you are using). This makes debugging and development easy and convenient. Generating screen-shots of the LCD is a snap. These screenshots can then be inserted into documentation. emWinView, a separate program shows the contents of the simulated LCD even during debugging. . Doing so allows the following:
-
Design of the user interface on your PC (no need for hardware!)
-
Debugging of your user interface program.
-
Creation of demos of your application, which can be used to discuss the user interface.
The resulting executable can be easily sent via email.
Understanding the simulator
The emWin simulator uses Microsoft Visual C++ (version 6.00 or higher) and the integrated development environment which comes with it. You will see a simulation of your LCD on your PC screen, which will have the same resolution in X and Y and can display the exact same colors as your LCD once it has been properly configured. The entire graphic library API and window manager API of the simulation are identical to those on your target system; all functions will behave in the very same way as on the target hardware since the simulation uses the same "C" source code as the target system. The difference lies only in the lower level of the software: the LCD driver. Instead of using the actual LCD driver, the PC simulation uses a simulation driver which writes into a bitmap. The bitmap is then displayed on your screen using a second thread of the simulation. This second thread is invisible to the application; it behaves just as if the LCD routines were writing directly to the display.
Using the simulator
The simulation contains one or more application "C" files, which can be modified. Typically you would want to at least change the bitmap to your own company logo or image of choice. You should then rebuild the program within the Visual C++ work-space in order to test/debug it. Once you have reached a point where you are satisfied with the result and want to use the program in your application, you should be able to compile these same files on your target system and get the same result on the target display. The general procedure for using the simulator would be as follows:
-
Step 1: Open the Visual C++ workspace by double-clicking on Simulation.dsw.
-
Step 2: Compile and run the application program (located in the Application directory).
-
Step 3: Replace the bitmap with your own logo or image.
-
Step 4: Make further modifications to the application program as necessary.
-
Step 5: Compile and run the application program within Visual C++ to test the results. Continue to modify and debug as needed.
-
Step 6: Compile and run the application program on your target system.
mWin supports touch screens.
Touch screen support for emWin is now available. This includes a low level driver, which handles the analog input (from an 8 bit or better AD-converter), debouncing and calibration of the touch screen. The window manager deals with touch messages and widgets such as button objects. It takes no more than one line of code to create a button or other widget, which then automatically handles touch messages and reacts accordingly. The widgets have different attributes, which makes them very flexible. Because in most cases the default attributes are fine, they are easy to use. Of course the touch screen support is written in plain ANSI-"C".
Touch screen simulation
The touch screen simulation is integrated into the regular emWin simulation. The mouse events are used to simulate the touch screen. Pressing the left mouse button anywhere in the display area has the same effect has touching the touch panel in the real hardware. Needless to say that the real application behaves exactly like the simulation. The simulation can be used to write the user interface of your application and can be send as simple exe file to anybody for discussion, demonstration or verification.
Do I need multitasking for the touch support ?
No. The touch screen has to be polled periodically (Usually 100 times per second), but this does not have be done with the help of a real time OS. You may also use a timer interrupt or simply poll the touch screen.
Sample program
Below you see 2 screenhots of the sample program. This sample program is compact and easy to understand.
In about 300 lines of "C" code we show you how easy it is to create buttons, how you may react to the events and how to calibrate the touch screen (if necessary). The sample also creates an antire "touch" keyboard on the display.
Download the sample simulation ! (150kb)
 |
 |
Antialiasing
Antialiasing is the smoothing of lines and curves. It reduces the jagged, stair-step appearance of any line that is not exactly horizontal or vertical. emWin supports dif- ferent antialiasing qualities, antialiased fonts and high-resolution coordinates. It is an optional package.
Lines are approximated by a series of pixels that must lie at display coordinates. They can therefore appear jagged, particularly lines which are nearly horizontal or nearly vertical. This jaggedness is called aliasing.
Antialiasing is the smoothing of lines and curves. It reduces the jagged, stair-step appearance of any line that is not exactly horizontal or vertical. emWin supports different antialiasing qualities, antialiased fonts and high-resolution coordinates.
Support for anti aliasing is a separate software item and is not included in the emWin basic package.
Quality of anti aliasing
The quality of antialiasing is set by the routine GUI_AA_SetFactor , explained later in the chapter. For an idea of the relationship between the antialiasing factor and the corresponding result, take a look at the image pictured. The first line is drawn without antialiasing (factor 1). The second line is drawn antialiased using factor 2. This means that the number of shades from foreground to background is 2 x 2 = 4. The next line is drawn with an antialiasing factor of 3, so there are 3 x 3 = 9 shades, and so on. Factor 4 should be sufficient for most applications. Increasing the antialiasing factor further does not improve the result dramatically, but increases the calculation time. |
 |
Applications |
|
Description |
Filename |
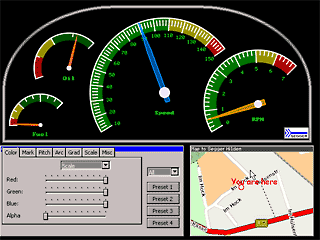
Automotive sample |
|
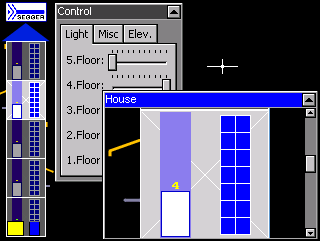
House control sample |
|
Xeye sample |
|
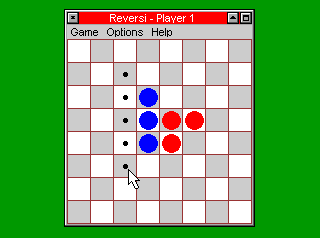
Reversi sample |
|
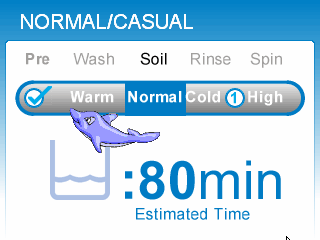
Washing Machine sample |
|
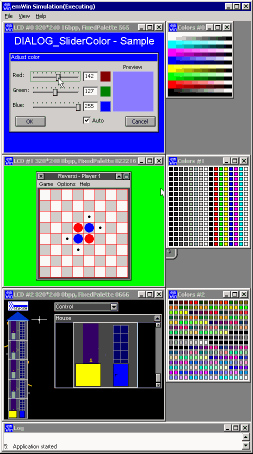
Multi user sample |
|
 |
 |
|
|
| Washing Machine | Reversi |
|
|
| Multi user | |
|
 |

